"The secret to getting ahead is getting started."
- Mark Twain
Woohoo! Your understanding of people is about to get simpler.
We're excited that you're taking the first step to get to know your clients better. But before diving in, think about your audience. Take a walk in their shoes (perhaps even dance in them for a while). What makes them tick?
-
What do you currently know about their behaviour?
-
Which goals are you aiming for?
-
In the past, what content resonated most with your clients?
-
Which misconceptions or questions might your audience have?
Those are some of the factors that will affect your ability to get high-quality data.
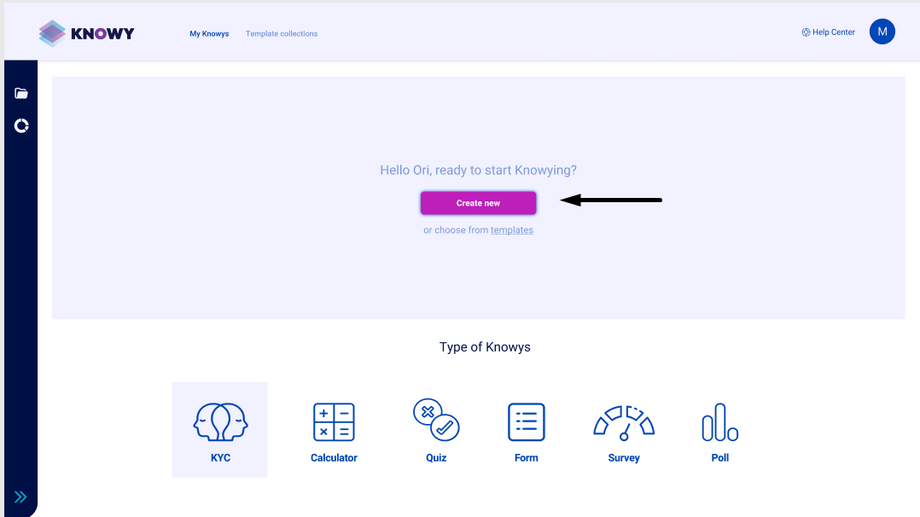
With that in mind, you can start to Knowy.
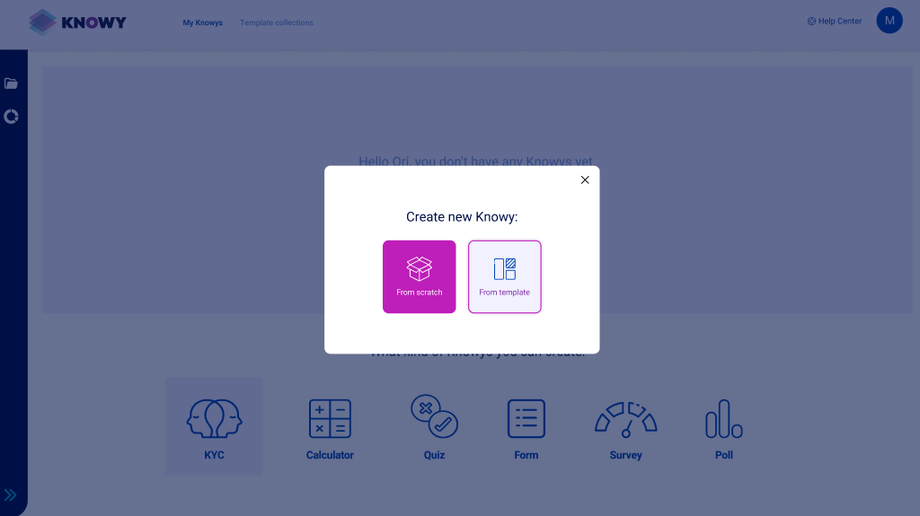
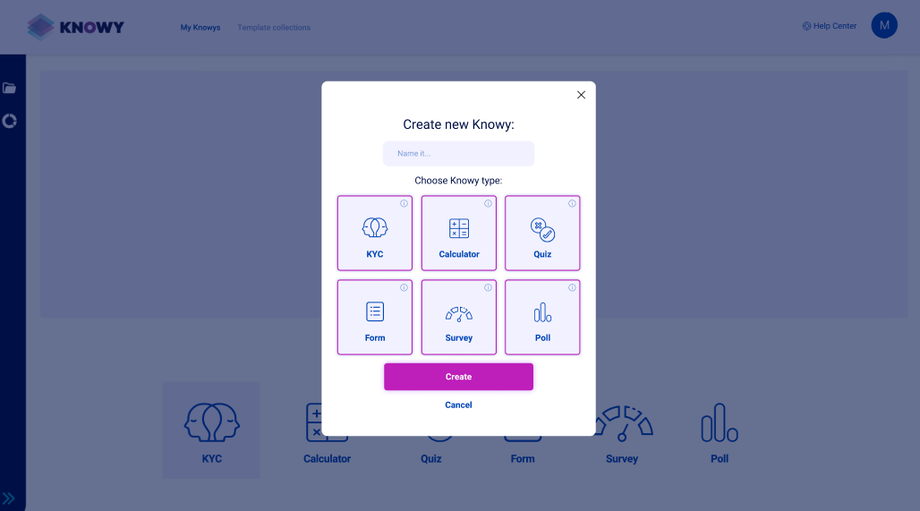
From scratch or from templates?


The 4 corners of a Knowy
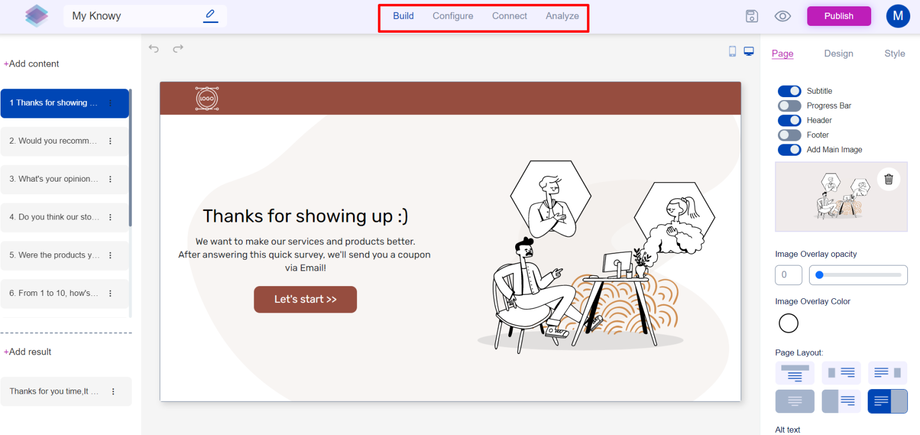
In the editor’s menu, there are 4 categories at the top: Build, Connect, Configure, Analyze.
Build – There you can build your Q & A's, create logic, and design easily.
Connect – In this panel you can connect your Knowy to various services.
Configure - General settings, SEO, Custom style, Custom scripts, Variables, and Accessibility. This allows customization and optimization of your Knowy.
Analyze- This section offers detailed statistics, filters, and answers with the option of downloading your DATA. There you could know if a Knowy works like you planned or not. Figure out your clients and adapt accordingly.
* Logic- After building your Q & A's, and creating results, you can manage the logic when clicking on a specific content.
To start, let's focus on your primary workplace - the Build section.
Basic question building
You can notice 2 main areas: On the left is your content (or question slides) , and on the right, you can find your tools to design those slides (Style\Design\My style).
To create a customized question, click 'Add content' and choose from various types. You can also see on the bottom left the button ‘Add result’. When you finish building your questions, you could insert results and build logic accordingly.
Designing made simple
If you click on a specific slide, you can edit its components, design, and apply themes on the right side of the screen. Notice that you need to select the slide you wish to edit.
Want to overlay your design all over your Knowy? Simply use the toggle ‘overlay style’. If you want to add GIF's or your own photos\videos, click on ‘Add main image’ and simply upload what you’d like on your slide.
Make logic & Configuration
Each content has the option of implementing logic. Click on the 3 dots in the question’s rectangle and build your logic (When you click on the dots you could also see a ‘duplicate’ option). Prior to building it, we recommend thinking about your logic and endgame.
You can add conditions based on questions, variables (including custom-made), and answers. To add your variables, click on 'Configure' at the top of the menu at the editor, and choose variables on the left. In this section you could also set up accessibility, custom styles & scripts, SEO, and general settings of the Knowy.
Connect your Knowy easily
Click ‘Connect’ on the top menu to connect your Knowy with: Gmail, Mailchimp, Active Trail, Twilio, Google sheets, HubSpot, Facebook, Click Up. In a few clicks you can streamline your DATA easily.
By using this section, you will be able to segment and act based on your analysis and ideas. Add triggers based on your clients' answers and your needs.
One step before publishing
After building, designing, connecting, and making your logic, it’s time to make it public! But before that, you can review your Knowy before posting.
Next to the ‘publish’ button you can see an eye and a floppy disc (save button, of course). Click on the eye to simulate how your Knowy would look like. When you’re happy with what you see, you can come back and click ‘Publish’.
Going public
Mazal tov! Your Knowy is out and beautiful. After clicking publish, you'll get the link to your Knowy, and a button named ‘embedding options’ will appear. There, we explain how to embed your Knowy, depending on your needs and target audience.
Analyze & React
That’s when the magic happens. Once your Knowy starts to get DATA, you can view it in the Analyze section (Top menu). There you can see detailed stats, filters, and answers.
You can easily see where it's working and where it's not. Change your Q & A's, or triggers based on the DATA. There’s no need to build it all from the start! Also, you can download your DATA.
 Personalized e-mails or SMS based on your Knowy's answers would make your clients feel special. That’s what DATA marketing is all about, and now you have it at your fingertips.
Final notes
That’s all the basic stuff you need to know before getting to know your clients. The more accurate you can be about your goals, the greater the chances of making an impact. You will see that as you move forward and use it, Knowy can be a powerful tool at your service. Data-driven decisions will make your brand or business better for your clients. If you have questions, don't hessite to write us!


